Sunday, July 29, 2012

making my own hammock - hammock construction

Pattern

I have been reading Just Jeff's Hiking Page on and off for over a year now.  It was his site that got me interested in sewing my own hammock, actually.  To be extra sure that it will support my weight and in case i ever want to camp somewhere that gets cold at night (not completely unheard of) i have opted to sew the Two Layer Hammock.  Jeff copied Risk's ZHammock.  I did not use a zig-zag stitch, but i did leave the sides open near the ends so i can insert a mat/pad/underquilt if need be.  Risk has some nifty mods to his gear that are food for thought as well, but on this, my first foray into sewing camping gear, i'm going to keep it simple.  I'm not going to start counting ounces but since i am considering trying backpacking someday i do want a lightweight setup, so his mods probably won't be that applicable to me anyway.  But they are shiny.


Construction

The most difficult part of this project was the first seam somehow.  I was delayed even sitting down to start several times and it took me a long time to pin everything into place.  I was hesitant while sewing at first because this fabric is slippery and i had never sewn anything similar before.  Fortunately the dining room table was cleared off and i was able to spread out the fabric to pin it (mostly flat, hanging off the sides and end) otherwise it would have been hopeless.  I did things in a different order than Risk did...i started with the rolled hem at one end (he's got a nifty diagram...i sewed green red red green and omitted blue seams).  I turned it under 1 1/4" twice for a combined 2 1/2" lost at each end.

Then i had to figure out if my machine worked.  It's an old Singer that only sews in a straight line that was once my Grandma's (i'm pretty sure it's one of the machines i learned how to sew on).  Fortunately the manual was still with the case to remind me how to thread it, wind the bobbin, etc., and i was soon able to start with surprisingly good tension.  I sewed once with the folded seam on top once and then again with it turned towards the bottom, trying to sew closer to the edge of the hem the second time.

first rolled hem
It isn't pretty, but it's serviceable.  It turns out that the little machine does still work after all these years!  The rubber belt gets a little warm/stinky when sewing/winding at full speed but i had very few issues compared to my other machine that i received as a present when i graduated from junior high.


ready to tackle the side seam
Next i pinned one of the long sides from end to end and measured out the first side seam.  I gave it the same double-run treatment.  Then i pinned the opposite side and sewed it in the same way.  And lastly i pinned the second rolled hem, which required me to trim some of the red/purple fabric away because it was cut slightly longer than the brown.  It was a lot easier for me to pin this second rolled hem than it had been for me to pin the first.


second rolled hem

stay/top stitched to imperfection
 The last thing i did was turn the entire hammock right side out.  This required me to pull the hammock through itself.  I stay-stitched all of the seams to reinforce them.  Once again, this came out a lot uglier than i would have liked, but considering that this is the first time i have used Rip Stop Nylon it could have been a lot worse.  The entire project took me less than four hours from start to finish.

Unlike Risk, i did not hem the free edges on the sides of the hammock.  This fabric has salvages with a frayed look but i'm pretty sure that it's not actually fraying, that's just how they were left after the fabric was woven.


Suspension Prep

whip it good
This afternoon i whipped the ends of the hammock as outlined by Just Jeff.  I'm happy with my knot but am surprised by how much of the hem is sticking out above the whipping.  It feels like a lot, and definitely looks thicker than the hammock in Jeff's examples (which is because it's double-thick, of course).  Tree huggers are on the menu tonight, and hopefully my first hang will be Tuesday night.

Now i know that i said in my last post that i'm saving ~$60, but this isn't strictly true.  That is $60 is i went with a barebones, less-than-ideal setup.  To buy a similar hammock at REI that apparently doesn't work right with the pad inserted it would cost me $95.  I paid $42 for my hammock materials, an additional savings of $43 were i to buy the hammock that's most similar to what i'm sewing.  So of course if you consider what i would have bought if money were no option...i might have chosen just to buy a Hennessy.  In that case the bug net, tarp, and snakeskins would have been included, but i would be saving even more money by customizing my setup.  This also means that if something wears out i can fix or replace what is broken rather than the entire hammock tent.

Monday, July 09, 2012

making my own hammock - materials

So i have been happily sleeping in a hammock for a year now (yay!).  The only drawback to sleeping in a hammock is that the frame in my room if huge and takes up so much space.  Also, the material that my hammock was constructed with (string) is fragile.  I have had to repair breaks several times after snagging on a button on my pants/shorts or one of the bolts on the frame.  One must be careful with these things!  The miracle is that this frame (that i made with my own two hands!) and this hammock hold me up every night and mostly seems like new.

Well much as i'd like to i can't lug my hammock and its frame out camping with me.  I knew this would be the case, and started planning to buy or sew a camping hammock even while i was buying and hanging my first hammock.  I bought some straps to make my own tree huggers at the same time that i was buying the materials to build the frame.  So today i'm taking the plunge and am going to start sewing my camping hammock!

To start out with...i debated whether it would just be easier to go to REI and buy one pre-made.  I read reviews, i agonized over it, but i finally decided just to make it myself.  Money and color were both factors in this (i do not want a camo hammock, and i'm not sure i want one that's lime green or royal blue or red, either).  As a result i was able to pick out the colors i wanted to use (subdued but still slightly feminine) and i got a great deal because the local fabric store was having a sale...they were closing up shop and moving to a smaller location that is only for sewing machines and quilt fabric (rather than the mega-fabric, mega-home decor fabric location they had been).

Hammock Material
6 yds ripstop nylon = $27.50 (3 yds each of two different colors, 54" wide)
25 yds nylon cord = $1.70 (for whipping hammock...no way i'll need this much)
1 spool Gutermann thread = $2.70 (100% polyester, recommended for sewing tents)

Mosquito Net/Snakeskin Materials
8 yds netting = $23.75 (in an off-white...taking a chance here)
1 110" Boat Zipper = $10.75

Tree Hugger
straps - two 7'x1.5" = $5
40 yds climbing rope = $8.25 (couldn't find Spectra rope in town or online for a reasonable price)

Tent
Kelty Noah's Tarp - 9'x9'= $49
Paracord = $13 for 100yds (won't need that much!)
Figure 9 rope tightener w/6' guy line x 2 - $7.50 (for tarp ties)
Tent Stakes x 4 = $10

Grand Total = just under $160


As you may have deduced, i decided to take the plunge and get an REI membership.  I'm not sure it's going to pay for itself this year, but the guarantee made it tempting to buy the Kelty Tarp through REI rather than Amazon even though it costs ~$10 more.  Half of that difference would have been made back at the end of the year with the member's refund.  Unfortunately the tarp was backordered through REI so i'm going with Amazon instead and hoping it arrives before it's time to go on the trip in ~3 weeks.

In case you're wondering if this setup saves money...refer to REI's selection of hammocks and realize that i have to have a setup that can hold more weight than some of the cheaper hammocks are rated for...and you still have to buy things individually (hammock + bug net + tent + tree huggers).  My tree huggers cost $5 compared to $20-25.  I am saving at least $60 by my estimates.

I will continue to edit this post while i am still working on this project.

Wednesday, February 22, 2012

What it's like sleeping in a hammock - 100th post

I went from my back always being in pain to almost no pain at all.  I went from it being too hot to even sleep to so cool that i sometimes actually needed a blanket to keep warm.  See, we're not used to sleeping without something that reflects/conserves heat beneath us.  I went from sleeping with three pillows (and feeling like i needed more) to sleeping with only one pillow, and sometimes no pillow at all.

What Kinds of Hammocks are There?
Contrary to what most Americans probably believe, a hammock isn't really supposed to have a piece of wood at either end holding it open.  In fact, there are some who would even deny that such a contraption is, in fact, a hammock.  I will call that an American Hammock.  The hammock that most of the world uses is called a Mayan (or Mexican) Hammock.  These hammocks are longer and come in a variety of widths.  The next kind of hammock is the Brazilian.  These are Mayan hammocks with lace or fringe hanging from the side edges so they're pretty.  Lastly, there is the camping hammock.  This is a shorter Mayan Hammock probably made out of ripstop nylon.  Some have a tent or mosquito netting sewn to the hammock.

Hammocks can be made out or rope, fabric, or string.  My hammock is string, and if you snag it the string will probably break.  I think that my hammock has suffered three breaks in the past six months.  These can be repaired with a Fisherman's Knot...which appears to be the same thing that was used whenever it was woven to change colors/skeins, etc.

How to Lay in a Hammock
Well there's two ways to get in.  You can sit down in the middle, then turn lifting your feet.  Or, you can straddle the hammock, then sit down, then pull your legs in.  I prefer the second method.  While you're in the hammock you don't want to be laying perfectly centered with your head and feet pointing towards the upright portion of the frame.  You can lay perpendicular to this line, but that also isn't the way one is meant to lay in a Mayan hammock.

The right way to lay in a hammock is at a diagonal.  Your head and feet do not have to be higher than your body.  I find that i usually a sort of Peter Pan position to hold the hammock open a certain way since i really have a hammock meant for two or more people to use at the same time.  But if i get arranged the right way i will be laying flat in whatever position i find to be most comfortable.  There are no pressure points, only support.

How to get out?  They say to sit up and do the reverse of whatever way you got in.  I have managed this a couple of times...but my hammock is huge and i am short.  Because i have to hang it high enough to clear the bottom of my frame, it's really too high off the ground for me to comfortably get out of using those methods.  It's easier for me to roll out usually, particularly because i'm not particularly coherent when i first wake up.  I have no idea what kind of untoward wear and tear this is causing my setup, however.

Bedding
In the summer, my system became putting a bottom sheet (corner curled around my feet and head) below me by wrapping myself up in it.  Once you're in the hammock, you don't have to keep it wrapped around you, you can just lay with the air above you or put a top sheet/light blanket on top.  In the winter...at first i needed to have a comforter below me or i'd be freezing.  I meant to try a sleeping mat (like for camping) but never got around to it.  Then for a while i was using a sleeping bag liner, sometimes with a light blanket below, a comforter on top.  Most of the time i forego the liner now and only have the comforter on top, sometimes that light blanket again.  I anticipate that in the summer i might not even need a sheet below me, maybe just above.

But I Can't Sleep on My Back!
You don't have to sleep on your back when you're in a hammock.  I usually sleep partially on my side, partially on my back, at least, that's how it feels once i get settled.  You can sleep on your stomach, but it's harder to get comfortable.  Ditto to sleeping on your side, though somehow this usually manages to make my lower shoulder hurt.  So the cradled 3/4 position is usually where i end up, even if i start in another position.  It's just so comfy.

the hammock project...part 3

Sorry for the delay in posting this!

Warning...image and clutter intense.

Sunday, January 01, 2012

Happy New Year!

Is anyone else having trouble with Ravelry?  I notice that there are some new features, but things such as searches, adding favorites, project progress, adding needles/store info to a project, organizing sets/tags, and my inbox are not working properly.  It's a little frustrating.  I have come to rely on Ravelry a great deal.
 ETA: It seems that i needed to clear my cache.  That is what their help/faq advised and it worked.

I didn't knit as much in 2011 as the two previous years.  I tried knitting my last semester in college for stress relief but it didn't work out past the first couple of weeks of classes.  There were many projects that i was dreaming of but didn't have the money to buy the yarn for.  Now those dreams have changed a little.

What has been an improvement of sorts is that i am now teaching knitting.  The first semester was craziness with the younger kids (who were mostly too young, so i am going to teach an Intro to Needlearts class now with more crafty objectives) and all of my classes shrank before the end of the semester.  I have high hopes for the semester starting in a couple of weeks however!

State of Knitting 2011
new projects
Sky Slippers (still incomplete)
Cloudy Giselle (for my sister using Giselle pattern again...about halfway finished)
Autumn Leaves (frogged)
Star-Crossed Slouchy Beret (frogged)
Braidy (probably soon to be frogged)

older UFOs (that i hope to return to soon)
Starfish Snood
Funky Grunge Cap
Slip-Stitch Baby Cardigan
Mom's Sampler Afghan
and the Liberty Cap

Oh, btw, i do still intend to write an update about my hammock.  I lost my camera's battery and only recently found it again (which was such a relief, let me tell you!).  I also have plans to blog more often this year.  My goal is to finish old projects and learn how to spin this year.  Here's hoping...

Tuesday, November 08, 2011

so frustrated

So i decided to look up Valley Yarns 2/14 Alpaca Silk on Ravelry to make sure that it is something i really want to invest in.  The colors are so lovely that i want to use several of them, not just the Pacific but the Olive and Copper if nothing else.  Alas, but this yarn is also getting bad reviews.  Splitting yarn is not ideal but the real deal breaker for me is that in a sweater it wears out quickly.  I would like to knit a shawl someday but that is not what i intend for my next project.  If in fact i can even manage another project.  I am so busy right now with work that the only day of the week i seem to manage knitting on is Tuesdays, and that only for a couple of hours.  My hands and arms are always tired from working nine hours the day before and taking Sign Language the hour before.

I want to be able to knit more...but of course i rarely get what i want.

Monday, November 07, 2011

Baby it's cold outside...

Well...it's not as cold as it could be, but it is getting to be that time of year.  Right now i have a hoodie with a broken zipper, a wrap sweater that is starting to show its age, a green sweater that is very warm, and a brown vest with sleeves about 2/3 complete.  I really feel like i need another sweater...if not two.  The question is...how much money do i want to spend on yarn?  How much can i afford to?  Would it be more cost effective to knit my own sweater, or would it be better to buy one (/shudder perish the thought!).

For months now i have really wanted to knit up Pangea but have been daunted by the price of the recommended yarn (not to mention the fact that it's grafted in the back...what's up with that?).  Fortunately i looked it up on Ravelry and have discovered that i really don't want to spend money on this pattern.  Suffice it to say that only a few people have attempted to knit Pangea, and apparently everyone except the designer has frogged it.

Here's my issue.  I want a wrap cardigan that looks similar to Donna's in End of Time.
I thought that Pangea looked similar enough for me as shown on the Webs site...only i intended to knit it in Pacific rather than Olive (the color which is modeled below).

I love this sort of lacy look, particularly since my own Tangy Giselle is about the right weight when i knitted it with larger needles than this pattern calls for.  So i was willing to compromise thickness for this beautiful yarn rather than trying to find something in a DK or Sport weight.  Then i saw the designer's version of Pangea and was more than a little surprised.
It's so thick compared to the Webs version!  She claims that it's because she didn't block the sweater but i am skeptical.  If i used the same size needles as she did, this would actually be very close to the weight of Donna's sweater.  But i am still put off by the fact that everyone frogs this pattern without fail.  I think that i am going to try to find another pattern that is similar and use this yarn, as when one looks at it objectively it isn't that expensive considering the fact that it's Alpaca/Silk.  Some people have complained about variations in tension but i experienced that while knitting with the Crystal Palace Kid Merino as well.

I also want to make a longer version of the Bergen Street Cardigan (probably in Pumpkin and Oatmeal?  maybe in Pumpkin and an Indigo/Navy) but am daunted by the fact that the cheapest yarn that i can find which is probably of a good quality will cost me upwards of $80.  I don't know if i need to knit this with worsted and adapt it, but i definitely don't want to use Fisherman's Wool yet again (which would probably be the cheapest option, actually, but i want something nicer than what i'm seeing in my brown wrap...it's already getting fuzzies and i've not worn it much).  Of course fuzzies seem to be a pretty common theme even when i pay more for yarn.  I'm starting to wonder if shopping at Webs is even worth it as everything is pricy and i'm not seeing the quality that i'd like to.

Thursday, August 11, 2011

the hammock project, part 2

To sum up part 1:  i bought a hammock, two eye bolts, two heavy-duty carabiners, and some rope to hang my hammock with...  Only to discover that i would need to build a stand.

The first thing i needed to decide was what material and schematic to use in order to build said hammock stand/frame.  The most obvious option was wood:  it was relatively inexpensive.  But i hadn't worked with wood in a long time, and i wasn't particularly inclined to spend $10 on the U-BILD plan that seemed to be the most professional looking source of information.  One big plus was that i could see a photo of the finished projects, while on the how-to and DIY sites were far less forthcoming.

This was also the case for PVC pipe projects.  PVC pipes were slightly more expensive, but the glue seemed to be less daunting to me than stain/sealer, bolts/nuts/washers.  I found one picture that looked promising of such a project, a GreatPlans number that cost $12 to buy the plans for.  Apparently PVC pipe furniture is popular, though i saw a lot of people advise against using it for weight bearing and instead advocated ABS piping or to stay away from these sorts of pipes all together.  One of the things that put me off this idea was the fact that the pipes cannot screw into one another (i think i'm right about).

My thoughts eventually turned to steel pipe.  This seemed to be the most practical option.  There are a lot of metal frames on the market, easy to copy from pictures.  However, this turned out to be cost prohibitive, far more expensive than wood or PVC, and i had read warnings that pipe is impossible to completely clean, that it is always oily.  This didn't sound practical for indoor use, and it was definitely beyond my budget.  If money was no option, i'm pretty sure that this is probably where i would have ended up.  Oddly, it was the craft in which i have the least experience.  However, the materials are strongest.

Finally, i stumbled upon the Hammock Forums and TrailH4X' portable hammock stand.  I felt as if the U-BILD option was a bit overkill, too low and not really practical for a Mayan hammock.  This seemed to be a inspired-by yet reworked version of the same pattern.  I'm not sure if that's true, but hey, a free schematic was definitely a plus.  One thing that i should have taken into account was the size of his hammock compared to mine (i assumed that it was a couple of feet shorter, but didn't take the time to confirm by how much), but it was a starting off point.  I decided to make the base 2' longer than Trail's and assumed that this would be sufficient.  So i went out and followed his shopping list, planning to make some of the cuts a couple of inches shorter so i didn't have to buy more wood than he had.  The wood was pleasantly inexpensive.  The stain was far over budget and i ended up getting more than i needed because i trusted the estimates of the employee who helped me rather than figure out the math myself.  And the bolts...i was confused about what kind to use.  He recommended 1/4" in diameter and i had a feeling that would not be sufficient.  But i purchased some of that diameter that were galvanized steel.

Upon getting all of the supplies home...i cut most of the would with my father's old electric saw and sawed through the remaining thickness by hand.  I slept in my old bed one last time.  The next morning, i put the first coat of stain on the wood.  And then i started to drill holes.

Stay tuned for part 3.

Friday, August 05, 2011

the hammock project, part 1

When i moved back home, not only had my old room been overtaken with sewing, scrapbooking, and various craft supplies, but i didn't have a bed anymore.  My old waterbed had a leak so we got rid of it...all except the headboard, which makes a lovely bookcase.  When i moved home, we gradually began moving some things out of the black hole that my room had become.  I was given an old full size bed with box spring that my youngest sister had been using.  It was already an old bed that had been given to us used, but i was glad that it wasn't a twin, even if it was only standing on the floor and there was no frame.

But that was a couple of years ago.  All that remains of the black hole is one bookshelf that is still filled with scrapbook supplies, empty boxes, file boxes, and gift wrap.  I have most of my room back.  But the bed...the bed is dead.  Springs are starting to poke out of the mattress and there is no support left.  This is disagreeable for anyone, but especially for me because i have a bad back.   When i first started using this bed, my back appreciated it and felt much better; now there isn't a morning that i don't wake up with my back complaining.

Well i am between graduating from college and finding a job at the moment.  Looking on CraigsList...beds seem to be going for $400 upwards.  I definitely can't afford that.  But no more can i afford to keep using this bed.  So i started dreaming of buying a hammock again.

Way back in 2003, before i even got my GED and decided to go back to school (this time to college) i moved in with my aunt and started paying her some rent.  She didn't have an extra bed, so i slept on an air mattress for a while.  I didn't have a bad back yet, but my back didn't particularly care for this mattress when my job required me to be on my feet all day long.  So what i really wanted to buy was a hammock, but upon some research i realized that it was beyond my budget.  So we bought a couch at a thrift store that was like new because it had just been recovered.  That was quite comfortable and served me well for nearly a year before i moved away.

But this time...i really wanted to make a hammock setup work.  Hammocks are good for your back.  Hammocks themselves are relatively inexpensive, it is the hammock frame that costs a lot (upwards of $100, which is extreme for my budget).  And then i stumbled upon this video.


RayD888 apparently sleeps in a hammock that has bolted into the wall.  All that you need is your hammock, two eye bolts, two carabiners, and some rope.  Much more cost effective than a hammock stand!  So i broached the subject with my father.  My mother tells me that he cannot comprehend why i would want to sleep in a hammock.  He has no back trouble whatsoever.  Well he didn't object at the time.  It wasn't until over a week (something like 10-14 days) after i ordered my hammock that he told me that he didn't want me drilling holes in the studs in my bedroom.

By that time i had already purchased my hammock online and received it in the mail.  So what's a girl to do?  Stay tuned for part two.

Tuesday, April 19, 2011

moving up...to the head of the class

My family has been involved in a homeschool co-op and music/arts/languages/drama conservatory for the past few years.  My mother is now on the board, actually.  Well, it seems that i will probably be teaching two knitting classes this fall, a beginning and an intermediate.  I've showed my siblings how to knit, helped people out when they were having trouble, but i've never taught someone from start to finish how to knit.  It's kind of exciting and terrifying at the same time.  I'm already starting to dream of what projects we will work on, but at the same time i'm not sure how many we'll need.  In the past they've had a sort of knitting circle class with no real formal direction.  I think i am going to aim for two projects per student but if need be can come up with additional projects.  So far...scarves with bulky yarn are the plan.  I'm thinking that a hat and/or socks will be in the works for the intermediate class.  Two-needle mittens may be the way to go for the beginning class.  Anyways, will try to provide more info as it becomes available!

Wednesday, March 09, 2011

contemplations on knitting

There are times when i feel like a poser when it comes to my knitting (let alone my crocheting).  There are all sorts of shortcuts i take that i'm sure would shock many a veteran knitter.  I don't knit a complete swatch, block projects, or seam.  I pick up stitches and knit in the round whenever possible.  I procrastinate horribly when it comes to finishing.  No matter what pattern i'm doing, what weight the yarn is, there comes a point where i am going to get bored with it and wish that i was already finished with the object.  There are periods of time where i don't knit at all, because i lose interest, because it's too hot, because i can't afford yarn for the project i want to do, because i threw out what the pattern said, made it up as i went along, only to discover that my project is now in need of frogging (to a certain point, if not entirely).

Will i always feel this way?  Will there ever be a point where i don't feel guilty yet completely justified in cutting corners, when i feel completely skilled as a knitter and/or pattern designer?  I have been knitting for fifteen to sixteen years now, after all!  And i still feel like there isn't enough knitted clothing in my wardrobe.  Perhaps there never will be.  It will be a sad day when i start to retire some of my more recently finished objects, however.  Sadder still that some of them are never quite done.

Wednesday, February 09, 2011

February already?

It feels like it's been forever since i've posted here...wait, it has been!  So knitting, unfortunately, has been on the back burner lately.  I had Bell's Palsy this past fall and school things started requiring a lot more concentration than usual (i.e. multi-tasking was impossible for a while).  I have gradually improved and think that my brain is finally pretty much back to normal.  However, this semester is even more hectic than the last one!  In fact, i'm going to be dropping a class tomorrow (no worries, it was an elective, i took a class in January Term so i could complete my final semester with only three classes if need be).  So i've only been knitting a little bit here and there and don't really have anything substantial to tell about...other than my Christmas knitting, and even in that case i unfortunately didn't get as far as i meant to.

So, in 2010 i completed the following projects:

Dashing Evi mittens FINALLY

Ginny's Hex Vest...which somehow ended up felting in cold water

Tangy Giselle - even more FINALLY, as i had been dreaming of this project for years and had multiple issues with it

Drunken Bees Toes - my socks still have issues that i need to work out


Gentleman's Matrimony/Cozy Socks

four Monteagle bags (with various variants)

a Lacy Starfish Snood that i'm in the process of reworking the band of (it turned out to be too loose)


Mega-Sonic Screwdriver for Megan

Shy Adipose for Josh

Wisp scarf for Abby

Lacy Skull Cap for Alice with matching mini-hobo purse

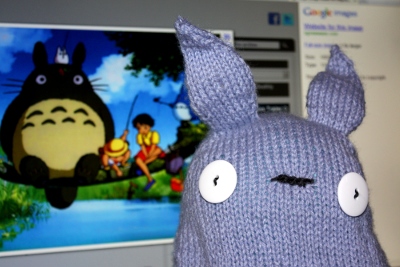
Baby Totoro cap for Caleb (that turned out being huge)

And my Asymmetrical Wrap...which doesn't have finished sleeves yet, but i've worn a couple of times as a vest.  The sleeves are in the works (i've finished the cuffs so far...pathetic, i know) and i'm planning to make them removable anyway.  I'm also planning to add ribbing to the back waist because it rolls up so much right now.

I guess i did get a lot of knitting done in hindsight, with about 15 projects completed and a few more started.  This year i hope to improve upon my finishing methods (weaving in ends, putting the zipper in my Fair Ginny cardigan, figuring out how to seam that baby sweater i knit years ago, etc.) and will probably eventually get around to working on quite a few projects.  River's vest (from Firefly) being among them... yeah, i've been crocheting more, even tackling amigurumi for the first time.  Yeah, i have been dreaming of a couple of projects but have no idea when i'll be able to tackle them.

Monday, September 06, 2010

Christmas is coming, the bag is getting fat...

I went a little crazy at Hobby Lobby today.  I bought a bunch of yarn, effectively committing myself to knitting and crocheting for 2/3-3/4 of my Christmas gifts.  Check out my haul:


$80 worth of yarn in my Mason-Dixon Monteagle Bag, which i knitted in hemp.  A couple of skeins are for myself, to knit more of these bags (i have two so far, and preferred the Sinfonia to the hemp, though they both work up pretty well), and to knit myself a shawl (which is something i have yet to attempt), but the rest...  Let's just say that i have a lot of Christmas knitting ahead of me.

ETA:  Off to add the appropriate projects to my Ravelry queue.

Monday, August 16, 2010

first project of the Fall (even though it's still Summer)

I actually have been doing more knitting than usual over this summer, not that i'm getting much done, but i am gradually working on several projects simultaneously.  These socks took me thirty-five days, which really is too long, but for the Summer is pretty good (not to mention that i probably only worked on them on five days all together).  I'm thrilled with how they came out, now i just hope that they fit the person i knit them for.

Tuesday, August 10, 2010

a glimpse into my purse

I like my knitting to be portable.  Even when i was working on Tangy Giselle, it was in my messenger bag most days right along with my textbooks.  I would work on it in class (when professors allowed), between classes while studying, it was heavenly.  The issue for me was always how to carry knitting supplies without losing them.  I was really worried about carrying scissors and poking a hole in my bag or losing my nice, birch cable needles (which have been borrowed and lost by family members, but oh well).  So, over time, i have gradually put together a compact kit that i will be able to travel with and keep some of the most important knitting supplies on hand.  The biggest thing that i'm missing is the ability to carry a crochet hook in it.  Here's what i carry with my knitting:


  • The case is from the Icing store at the local mall:  i got it on clearance for $2.75.
  • The tape measure is from Wal-Mart, i had it on hand, it probably cost me about $1.
  • The stitch holders were a gift from a family member who knows that i knit.  I have some larger ones at home, but this is a handier size and prevents me from losing my stitch markers.  Sets of 3 with varying sizes are about $3-5 new from Michaels or Hobby Lobby
  • The blanket pin is what i'm going to be using until i find a shawl pin that i like well enough to splurge on.  $2 from Michaels
  • Cable needle, bought in a set of 3, probably from Michaels.  Again, about $2.
  • Stitch markers...i use a lot of these (and lose them, too).  I have about ten on the needles right now, three off, and have lost 7.  These are nice and flexible, and come in two sizes (in the same package) and two colors.  I prefer orange and blue to the new green and purple.  $6 for 20 at Tangle, i think they were cheaper at Michaels.
  • Nail clippers, found at Big Lots...i think they were $1.  These are short enough to make it through security at an airport.
  • Not pictured, but often with me, is my row counter (which i have on a keyring, so it's usually with my keychains).
  • Total cost of $10-15

Skacel Addi Turbo review

It doesn't rain but it pours, so i'm going to write up my opinion about the  Addi Turbos.  I'd heard good things about them for a long time, but i'm wary of metal needles:  my first couple of pairs were too heavy, the ones i inherited from my Grandma no longer have smooth tips, and i've heard that they can explode in cars due to static electricity or some such.  However, after knitting up the Boing socks separately, months apart, and with a gauge issues that made them two slightly different sizes, i was looking for a new solution to sock knitting that wouldn't leave me wanting to quit before i've even started.  The Brittany birch dpns (though lovely) tend to be too fragile in size 1 and 2 for my klutzy ways, and they're too short to for comfort (in my opinion, 7'5" isn't long enough, let alone 5", without risking dropped sts or adding weight with point protectors that fall off anyway), so i was looking for a new solution.

I did a little research, and can definitely see that sock knitting is largely about personal preference.  Some people knit two pairs of socks on one set of dpns (one inside the other) but most people seem to knit one sock at a time on one set of dpns.  But i'm one of those people who, upon completing the first sock, despairs at the thought of starting a second.  To me, binding off = project finished = time to wear.  Which is why i had two matching socks that don't fit exactly the same way and were knit months apart from each other.  So, when i stumbled upon the idea of knitting both socks at once, on two circulars or with one long circular and a magic loop, i decided this would be the way to go for me.

Which is why i decided to buy some Addi Turbos.  They are smooth, lightweight, the cables are thin, and my Bees Toes socks knitted up quickly and like a dream.  The cables are a bit stiff, but my guess of 32" long proved to suit my needs nicely.  They're already showing a little wear, but the tips are still smooth and i anticipate creating more projects with them.  5 out of 5 stars here.

What i have discovered, however, is that my tension is very loose compared to most people (perhaps this is because i now knit Continental style, rather than English:  i know that my tension while knitting English is tighter).  I originally thought i had bought size 2s (they were on the wrong hook, i'm guessing, as it's all right next door to each other), when i really had size 1s but was getting the gauge i expected from 2s.  So i went out to buy a set of 1s only to discover that i already had that size!  I now own a pair of size 0s and would like to order some 00 and 000 eventually. I still haven't decided if i want to get the size 3 tips to match my interchangeable set or just go with another set of Turbos.  It will be a hard choice.

There is a difference in cables.  My first set was just a Turbo, and has a beige cord.  My second set was a Turbo Lace and had a light blue cord that was slightly more flexible, so i prefer using them.  They've now changed the Lace cords to red, apparently, so i have no idea if those are more or less flexible than the blue ones.

Webs Interchangeable Needles Set review

And now for some needle reviews!

This past Spring i splurged on the WEBS Interchangeable Needle Set in bamboo.  I love knitting with bamboo needles, but in the past it's been cost prohibitive to buy yarn for a new project and the corresponding needles to go along with it.  I felt this would be an excellent solution, and it sounded like a great deal when you consider that it's nine needle sizes in numerous length combinations.  I have mixed feelings about my purchase, however.


Pros:  The tips are lovely, smooth, and not too sharp, they feel sturdy, and light.  The cables are a little thicker than i would like, but very flexible considering.  The screws fasten smoothly, and don't exactly lock, rather have a firm stop.  I haven't had any issues with them unscrewing themselves like i did with the Boye metal tips that i used to knit up my Flaming Snowboard Beanie ages ago.

Meh:  The cables come in two different sizes, brass and black (or thin and thick, respectively).  Tips size 4-6 come with brass receivers, while sizes 7-11 come with black ones, which indicates "which diameter of cable should be used."  The brass cables came perfectly set up, but with the black screwed ones required me to ease them a couple of millimeters farther out of the clear cabling in order for the receivers to be able to grip the screws properly.  This was nerve racking for me, i certainly didn't want to mess up my purchase, but once i adjusted them, most have worked fine.  As it turns out, the black receivers can take the brass screws, but then the cable doesn't form a smooth fit with the female end.  The brass screw cables are narrower, so the black receivers need to have a larger diameter to accommodate the thicker cables.


Weak Cons:  Some of the numbers on the tips are already starting to wear off.  One of my size 10 1/2 tips doesn't lock on most of the cables: it just keeps turning.  It's not going to fall off, so i can still use it, but it's annoying.  The size 7 and 8 tips are very snug on some of the cables, so it's trickier getting them locked in:  i think that the 7s would have been better suited to the smaller cables, but they have the black ends.  The case isn't quite as nice as i was expecting (the quality of fabric and sewing being the issue).

I wrote in the needle sizes by hand for quicker extraction.
As you can see, i currently have three projects on needles from this set.

Huge Con:  The real issue is with the 24" black cables:  most of the tips can't even grip the screws, and when one can, the other can't.  I cannot ease the screws farther out of the cables as i did with the rest of them, and trying to use pliars only damaged the screws.  So i have one damaged 24" cable and one 24" cable that i can't use, anyway.  My fingers are sore at the moment from trying to fix this, and i'm sure that i've tried other times in the past and gave up on it.

32" (left) and 24" (right)
The knobs work fine, but are a little smaller than seems rational.  I'm always paranoid about my sts slipping over them (not that they have, it's just a mental thing for me).

The connectors seem to work fine (except on those 24" cables, which is where i wanted to use them, of course), though the brass ones don't connect as smoothly as the tips do.  They haven't snagged anything yet, but i'm extra careful around them.

So overall... i guess i'll give it 4 stars out of 5.  It really annoys me that i cannot use those 24" cables.  I don't know if ordering replacement cables would help.  The kicker is that i didn't test everything out immediately after it arrived, just gradually as i started to use it, so i feel ridiculous about e-mailing or phoning them with a complaint now.  This seems to be the best set currently available online, but there is definitely room for improvement.

correcting an oversight

I just realized that i never provided an update on the knitting that i did while in Europe.  I ended up taking my Boing socks and Dashing Evi.  I think i probably took some other sock yarn, as well (probably the Regia for Bees Toes), but i didn't get around to using it.  I spent most of my time working on the Boing socks, predominantly while on layovers in the airports, on the train from Civitavecchia to Rome and back again, on the bus from Izmir to Ephesus, and on the bus to Cairo from Alexandria.  I did go to (what was supposed to be) a knitting meetup with my sisters on the cruise one morning and worked on my socks there, but no one else showed up!  So i finished my socks in Barcelona (bound off in the hostel and wore them on the plane home) and hardly worked on Evi at all.

It's surreal to think that i have now traveled (and knit) in Europe, Asia (questionable:  the part of Turkey that we were in is generally considered to be part of Europe, i believe), and Africa (a.k.a. the Middle East).

Saturday, July 24, 2010

fixing a frustrating pattern problem

This seems to always happen to me these days: i get to a certain point in a pattern where, even though i've followed the pattern thus far, it doesn't allow for what i want to do with the pattern next. In this case i wanted to make the sleeves on this sweater convertible (that is to say, a vest with sleeves that can be buttoned or snapped on).  Unfortunately, i wasn't quite sure how to do this, and i was in a hurry to get the project done, so i just started the sleeves in the round at the armhole.  The trouble was s a little issue with the sleeve being too baggy. Take a look (the one on top is my solution, the bottom is the sleeve before i took it out):


I'm not sure that you can really tell while i'm not wearing it, but there was excess fabric bulging under the arm even after i reduced under the arm for about 12 rows.  This sort of thing happens to me quite a bit due to my excess bust size and designers not expecting women to have breasts.  So i frogged this back to the live armhole sts (there are 4 sts picked up at the shoulder and 2 sts picked up under the arm) and knit around one complete row with the start of the row as the underarm.  There are 70 sts total, and i have divided with 7 sts on each side of the row marker.


To the right of the row marker i reduced with ssks, on the left side i reduced with k2tog on the right side or p2tog on the wrong.  Inside the markers i knit or decreased only, but for the other 56 sts i worked in a k2, p2 rib.  So to start out, i k5, k2tog, worked in rib until the next marker, ssk, slippped the last worked st back to the left needle (along with the marker), turned, and worked rib around to next marker, p2tog, slipped st back to left needle, turned, work to next marker, ssk, k4.


So it's kind of like i worked in short rows, but instead of wrapping sts i turned at my dec st.  The next couple of sts of rib i made sure to keep snug, but not tight, and each dec becomes part of the next dec the next round, so there are no holes.  I went through the same process again (with less sts around the beg of the row, obviously), leaving 2 sts on each side of the center marker (60 sts).  The decreases created a triangle, as you can see below.  From there, i bound off.


So the armhole is now pleasantly snug.  It looks a little tight in the photos, but it doesn't feel tight at all.  Hopefully i will get some better images up here (or on my Ravelry) soon.  Right now, it needs to be blocked a bit, and then i need to start on the sleeves before it cools off too much (one can only hope!).

Wednesday, March 03, 2010

2009 in review

i did, quite honestly, a lot of knitting this year, and also some crocheting. It seems rather amazing to me that i finished eleven projects and began at least five more. i knitted my first sweater, my first pair of socks, and knit in Europe (most notably the airport in Germany, the hostel in Barcelona, the train to and from Rome, and the ship on the Mediterranean). This blog may not show how busy i was, but Ravelry was one of my most frequently visited sites, and i fully intend to keep knitting... and maybe crocheting, too. (:

My 2009 projects included:

Fox Coffee Beanie Reborn


Liberty Cap 1.0


Fair Ginny


Ohm Mat Bag


Chunky Cabled Cap


Ski Helmet Liner, Jr.


Boing Socks


three Hobo purses


Ski Helmet Liner

and pictures are forthcoming on Dashing Evi and the Ginny Hex Vest.


Since the new year i have already completed two more projects and started two more! So even with reduced time for knitting (this semester is intense!) i have been knitting every spare moment. i even wrote a poem about knitting last week... and am dreaming up new projects all the time.